The only way I could think to do the miter was to get it close, then finesse it to perfect using a hand plane (Low Angle Jack being the weapon of choice). To make it easier on myself I decided to make a single purpose Donkey's Ear type planing jig. I thought about making a generic one, but I don't see needing one 18" long and 2.5" thick in the future. Of course first I needed to cut some miters. For the top and bottom pieces (45* on the long edge) I used cutoffs from my french cleats which I triple checked for 45. For the end pieces I thought about just setting my miter gauge, but 45s are something I could see doing more of so I decided to make a dedicated sled. I liked the picture frame sled from FWW a few years ago, and its use isn't limited solely to picture frames, so I made one of those:
 |
| I put this off for far too long |
And since I had some walls that needed posters, and posters that needed frames, I tested the sled a few times. Which required a spline jig.
 |
| Nothing fancy but it works well. |
 |
| The posters definitely improved the feel of the shop. |
 |
| Not in love with this wall, but the posters help. |
I still have 2 more posters, and wall space for more french cleats, if I can figure out what I want to put on them. While I was distracted I figured I might as well finish that Longworth chuck I started a few months ago.
 |
| Not the prettiest but it will work. |
And finally I got back to the coffee table. I cut the 2x4 to thickness and screwed together my planing jig.
 |
| Time to make some shavings. |
After getting close it was clear that hte jig was bowing a bit due to the clamps being located at the very edges. I added a little pressure to the middle and cleaned it up.
 |
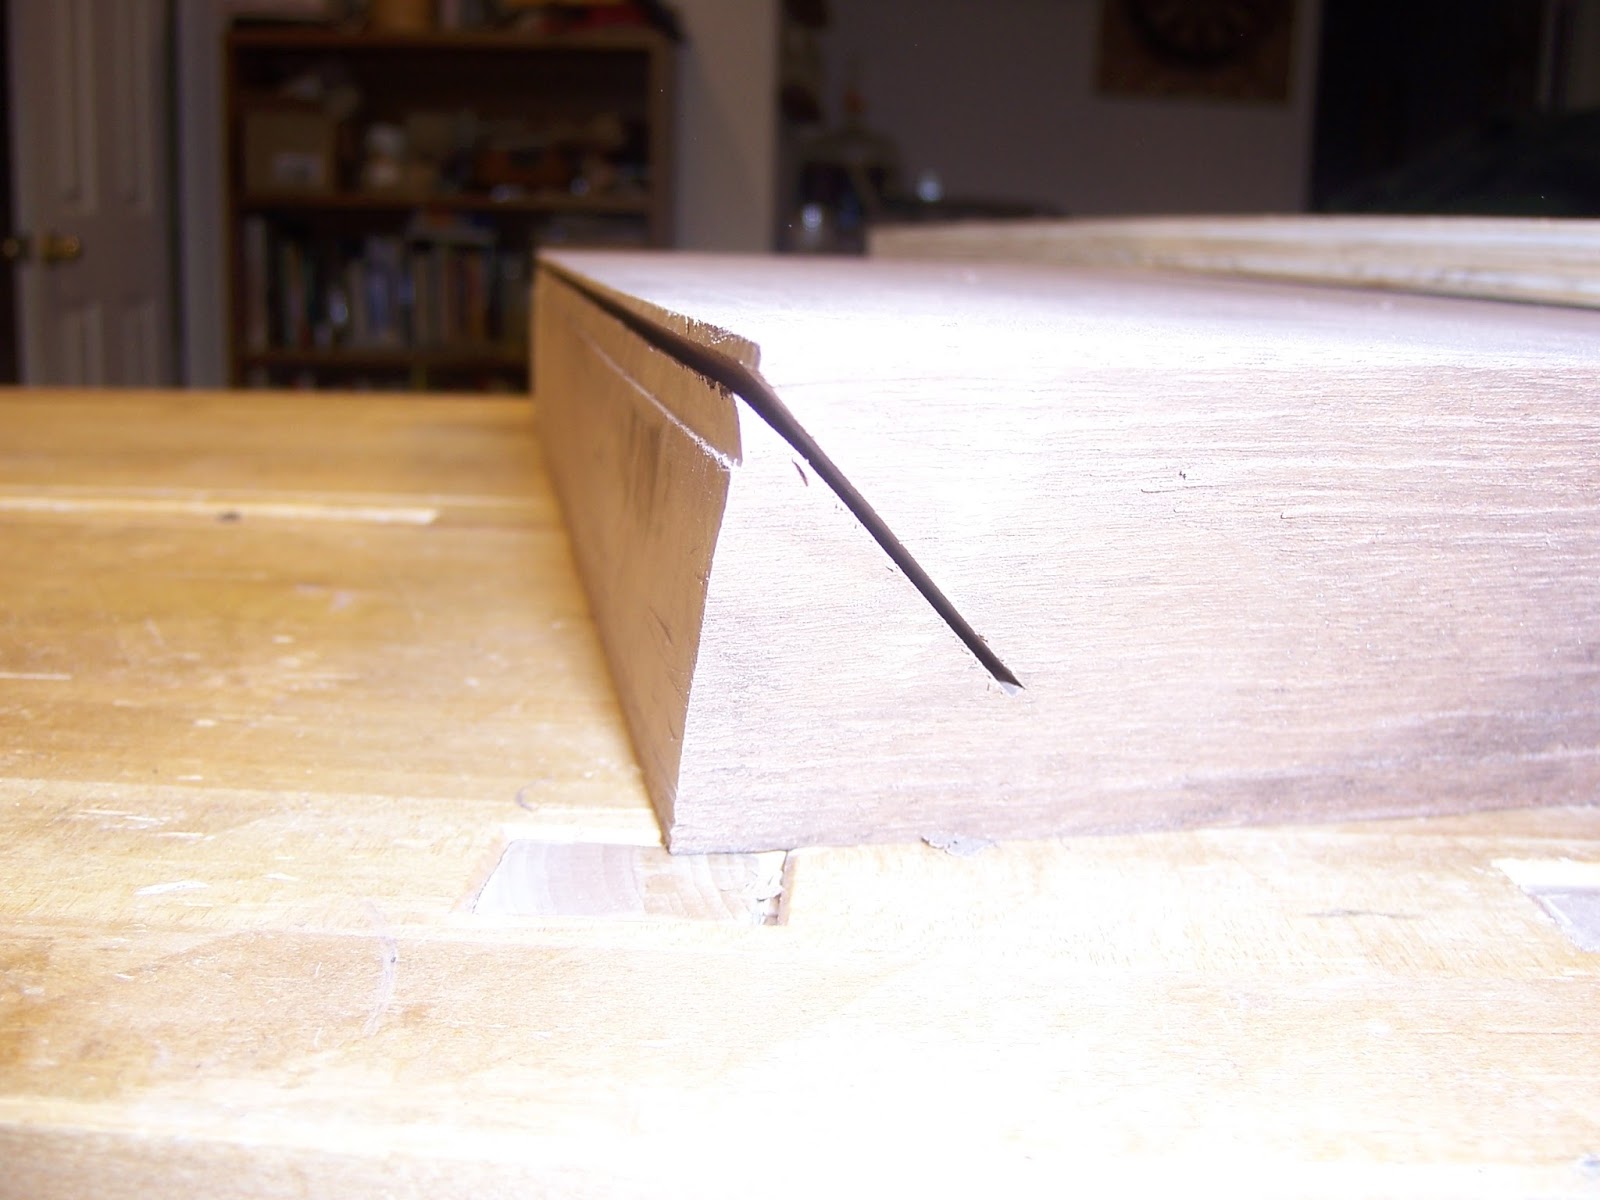
| Almost there. |
As I was finishing up the first side I realized that I needed a way to reference the jig if I needed to trim it up again. I started by just drawing a line, but even that didn't really sit well with me. I ended up ripping some thin strips and using 2-sided tape to create a solid reference surface for the back of my jig. Then I did the other side, and tested the fit. At first I made used plywood to make an "inside corner" that sat on the outside of the joint, and it was easy to see how far out of 90* it was. It wasn't. However it prevented me from seeing how the edges met. After some thinking and very careful maneuvering I was able to look at the outside of the joint.
 |
| Testing the fit |
 |
| Pretty good |
Overall the joint was pretty tight. But after a bit more fussing I realized that the wood had cupped every so slightly. Over 18" (then double since both the top and the leg cupped) ever so slightly isnt good enough. Luckily I left the reference boards in place and was able to take the cup out where the jig attached. It was probably no more than 4 passes with the plane and the joint closed up along its length. To mortise for the tenons I need to create sort of a box joint jig. Luckily I can use my reference strips to align the box joint jig.
 |
| Nothing fancy but it worked well. |
This was one of the few operations for which my shop struggled. I have all the tools, and skills, the problem is the bench is in the wrong room. I tried clamping the table to my other workbench and hit a wall. I tried to attach it to my table saw, but the clamps didn't feel as solid. In the future I will look for ways to add some clamping surfaces in the machine room (though this is a fairly unique project). The only trick is making sure you flip the pattern over when routing the other side.
 |
| Alignment looks good. |
Then I just cleaned up the edges with a chisel. Since my mortises weren't all exactly 1/2" wide, and also probably varied in length just a little I cut the tenons a little over sized ~1/32".
 |
| Ready for fitting. |
First I planed them to thickness (starting with the widest going down from there). Then the mortises and tenons were all labeled. I decided to alternate grain direction, though I can't image it makes any difference. I trimmed them at the shooting board.
 |
| The first five have been fitted |
The first test fit went pretty well. Nothing bound, , but one corner didn't close. Since I knew it fit before the tenons, it was a quick diagnosis (a few tenons were just a little oversized). After trimming them at the shooting board all was well.
That was the first of many test fits. Eventually I came up with a system that was fast and safe enough to actually add glue. Then I took a breath and slowed down. I organized my clamps, swept the floor, gathered some scraps and cauls, got out the gloves, pre-ripped some paper towels and covered my bench with wax paper. I consciously spent time prepping for the glue up. I recently started doing this when faced with something stressful/irreversible, and I find it helps me relax and makes the process much smoother. Finally I stopped putting it off, and did the glue up.
Overall it went well. It could have been a bit smoother, but the miter looks pretty tight, and its square. In a day or so I'll take off the clamps, and hopefully no surprises.