Showing posts with label pine. Show all posts

Tuesday, December 8, 2015

Nakashima Inspired Table (pt. 1)


With Ian running around our glass top coffee table was destined for a short life.  In September we took a drive out to Dunlap Woodcrafts.  This is not your typical lumber store.  You will not find piles of 4/4 FAS boards.  What they do have is thousands of bdft of flitches burls, and big unique lumber.  While Ian played with the proprietors I was looking for the right slab to take home.  We found one, and it spent a couple months leaning on a wall in our living room.  For those of you following along, I have been busy building other things most recently the Woodworkers Fighting Cancer table and chair set, and a growth chart.  More information on WFC can be found here.
While he didn't know what to think at first now he loves his chairs.
I carved then painted the numbers.  Used a plane after to remove the sloppy paint.  Pine with a coat of shellac.
Part of the delay was necessity and part(most) was not knowing what I was going to do with the legs.  Last weekend I decided to grab some 2x and mock up some ideas:

Classic Nakashima style with slanted leg.
More modern, waterfall leg, and open trapezoid for the other leg
Once we set up the slab and looked, the waterfall/trapezoid won.  Those legs made the slab look lighter and seemed to flow with the room.  The waterfall leg will be a challenge.  After going back and forth I think the best way to reinforce the miter is to make "Full-Blind Multiple Splines".  This provides the most face/edge grain glue surface.
From "Tage Frid Teaches Woodworking: Joinery"
The miter requires that the piece be jointed and thicknessed prior to layout.  Even if I had a jointer, it wouldn't help me on this one.  So time to get out the jack plane and go to town.  Using my bench as a reference surface it had maybe a 1/8" of twist.  A few hours later it was trued up,

Start by marking the high spots.  
Almost there...
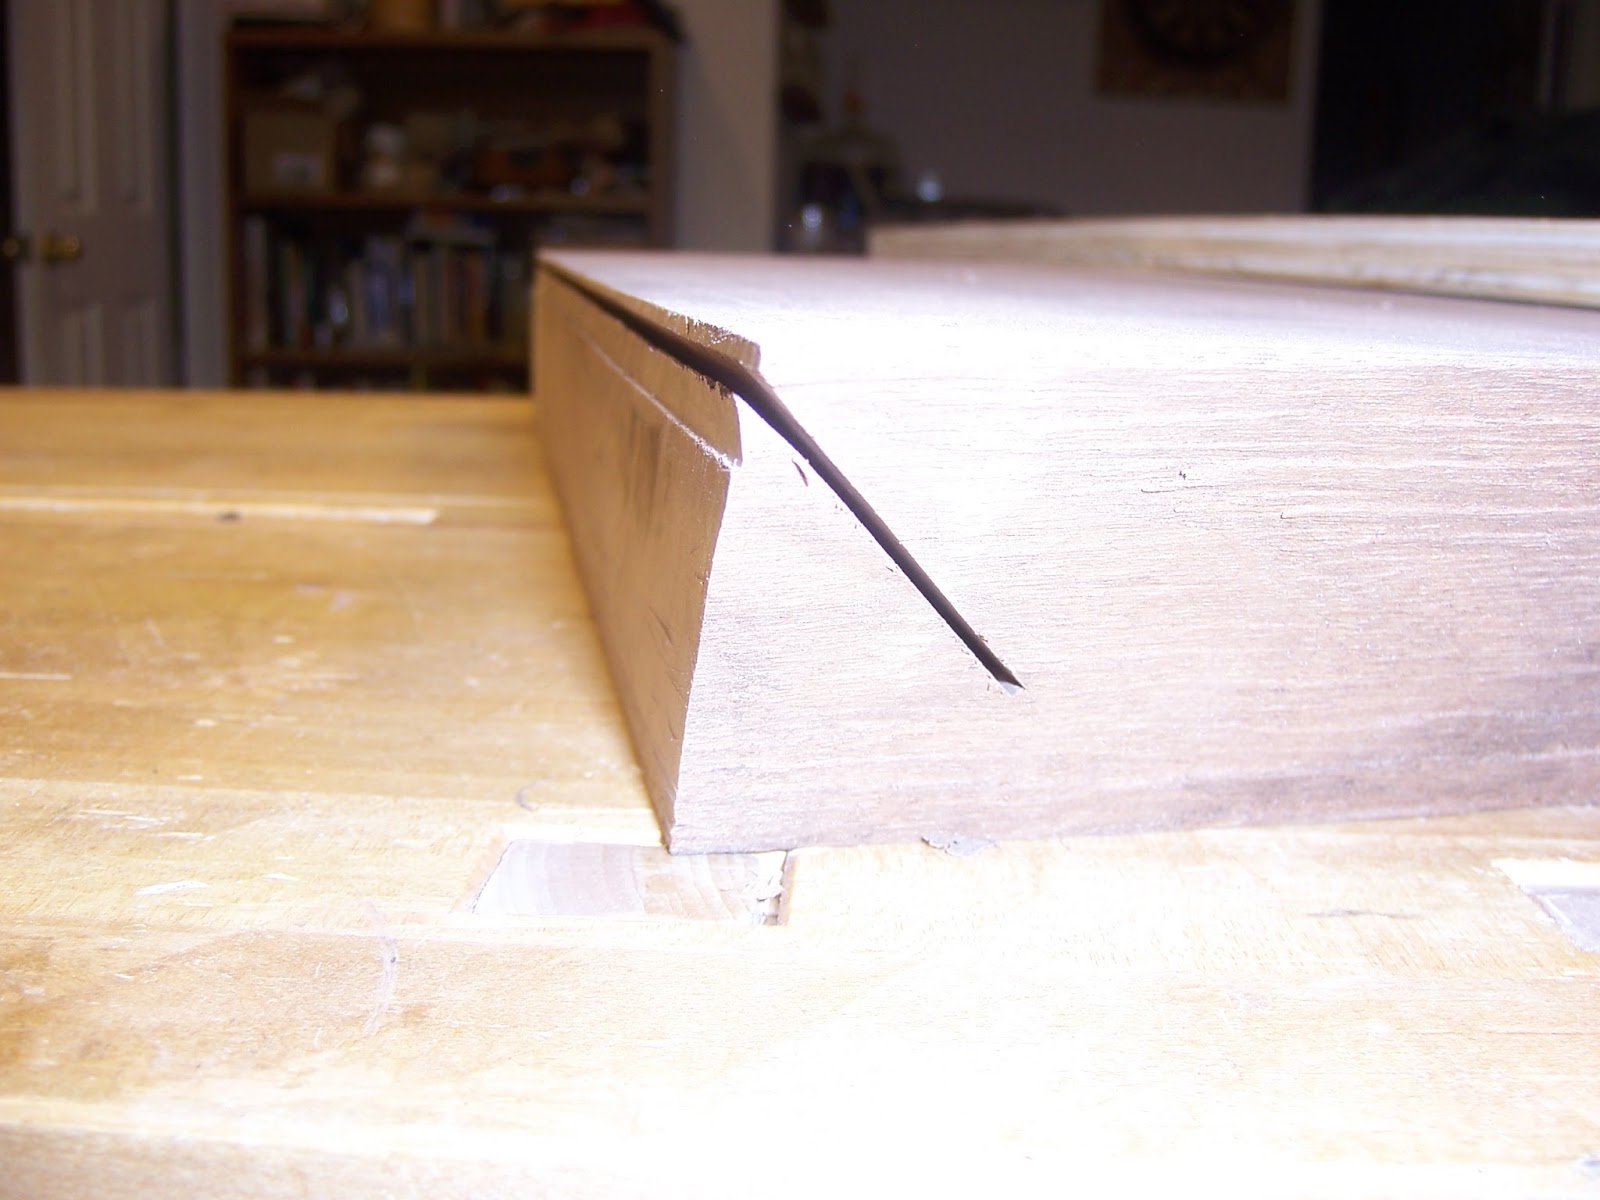
After I got the the board planed it was time to commit and make some cuts.  These were done with a circular saw out in the garage.  First I made 90* cuts to separate the top from the leg, then cut the 45* angle.  With the blade tilted it didn't cut all the way through, so I finished them off with a hand saw.

Double check everything.
No going back now
I finished this with a handsaw
This is the way it sat for a few weeks while I made my 45* table saw sled, (tested it on some picture frames) and a reference jig for truing the miter. 

Monday, November 10, 2014

Update and a small project

A lot has happened in the last 6+? months since I started the sideboard.  For one thing, I finished it.
Fin.
But then I found a job in a new location.  So my wonderful (7 month pregnant) wife and I packed up our giant Texan house and moved to a suburb of Washington DC.  Just as we were getting settled, and I had started dimensioning the wood for the crib, our little boy decided to arrive 5 weeks early.  Later, we stuck him in a pumpkin...not everyone had fun.
Ian
Since I would rather spend time with my wife and son, than in my new fully functional but very very small shop, I bought a crib.  The cherry allocated for the crib is still kicking around, but it is no longer an item of primary importance.
My new shop (with wood, for the crib?)
Our new house does not have a small alcove for our receiver and DVD player like our old house.  Until now they have been living on a wire rack, that is neither attractive, nor positioned well for use (the remote only worked from 1 cushion on the couch...first world problems).  To remedy this I could either build a new low entertainment center, or make a small thing to lift the TV off the cabinet enough to fit the receiver and DVD player.  Since this isn't permanent, we needed it quick, and I didn't have to buy any wood I decided to build the small lift thing.  It is pretty simply and the dimensions were determined by the receiver.  I did decide to complicate it by making the center support a sliding dovetail instead of a dado.  Since there are lots of how-to's for through dovetails I didn't take pictures of that. I did take pictures of how I made a sliding dovetail by hand.  First I marked the tail and used a marking gauge to define the shoulder.  I used a board to keep the saw at 90 degrees and sawed to the line.
Cutting the shoulder of the dovetail
 I cleared the waste with a chisel then snuck up to the line on each end. By putting part of a wide chisel on the previously excavated section I was able to keep the slope pretty constant, and just worked my way to the middle.
Slicing the angle of the tail
Getting tail size
Transfer tail size
I used dividers to transfer the narrow part of the rail to the pin board?...not sure what that part is called.  The using a block with the same angle cut down to the correct depth making sure to offset the block the the saw kerf (though one could also flip the block over).
Cutting the angle using a guide block

Most of the waste was cleared with a chisel taking care not to destroy the edges.  Then a router plane to sneak up to the final depth.   Once the waste was clear, I adjusted the fit and tapered the tail using the wide chisel.
After clearing the waste with a chisel.
A few passes with the router plane to bring the slot to final depth.
I finished this with a few coats of garnet shellac, and some wax.  Now we can use the remote from anywhere in the room, and the college style wire rack is gone.
The sliding dovetail.
Those other dovetails.
The finished piece, nothing special but it works well.

Next up is a canoe rack out of dimensional lumber.  While the wood may not last forever, the joinery certainly will.


Saturday, February 1, 2014

Dutch Tool Chest

Back in November I took the Dutch Tool Chest course with Chris Schwarz at the wortheffort school in San Marcos, TX.  It was a much needed break from work, lots of fun, and resulted in a tool chest.  The Dutch Tool Chest is a unique design that results in decent tool storage, no horizontal surface to use as storage preventing the opening of the chest, and is quite easy to build.  It can hold essentially all the 50 or so hand tools needed to build just about anything, though fully loaded its not easy to move by yourself.  The class was  full two days, which resulted in a completed carcase, with just the front and top remaining, along with the insides.  This class is well suited for people just getting into hand tools, wanting to learn to cut dovetails, and dados by hand, and end up with a useful project.  For more experienced woodworkers it was a great refresher on all the good habits you've replaced with lazy bad ones.
wortheffort, with Brady intently chopping dovetail waste in the foreground
About to start fitting the back
I got a few important things out of this weekend.  It was a great confidence booster, that many of the skills/techniques i developed through making mistakes and deciphering overly opinionated forums, really were some of the best ways to work.  I also learned that I can put in 2 full days (9+ hours) in the shop, and that I was just lazy all the previous weekends.  I also had a chance to work alongside others, which is rare in the solitary world of garage/basement woodworking.  That was quite enjoyable and a great way to catch mistakes before you make them, or at least while you can still fix them.  In fact one of the best things was that I was able to go with a friend of mine, Brady, who has also recently been updating his blog at KirkwoodWorking.  Saturday evening, we all went for drinks after which Chris Schwarz gave a nice talk on the evolution of workbenches followed by a Q&A session.
Chris and I discussing the finer points of screw clocking
Unfortunately after that weekend it was back to long hours at work, and working on the upstairs floor before Christmas, so the tool chest sat mostly idle.  Eventually I found the time to finish the lid, and start the insides.
On Tuesday we had a rare "snow" day here in Houston, and I was able to finish up the interior bits of the chest.
The inside with tools.

Rip and crosscut panel saws on the lid
Bottom with small drawer
Finally I took some in progress shots of the small brass mallet rack in my tool chest.  I started with some scrap oak, and traced the shape of the mallet on the ends.  I am a big fan of quick and dirty waste removal, so I cut a couple slits down the length and split out the waste with a chisel.
Freshly sharpened rip panel saw

Using my new handscrews instead of my hands

Then I took a more refined approach, using #8-12 molding planes, and finally the mallet head wrapped in sandpaper.
Close to the line with planes


Cleaning up a few plane tracks

Now I just need to make a stand to raise it up a few feet, and probably some wheels, cause fully loaded its not something I enjoy lifting.


Friday, January 31, 2014

2013 Projects Part 2

The second half of the year consisted mostly of working, running, and flooring.  No one likes pictures or descriptions of cubicles or me drenched in sweat, so instead some pictures of flooring:

First three rows

A little further along
Floor complete
Eventually the upstairs was completed.  The stairs look a little longer has I had to make the bullnose out of solid hickory, then get the stain to match.
First Flight

Second flight and hall
The three astute readers may notice the appearance of a green chimney cupboard upstairs.  I finally finished the hand tool only chimney cupboard.  This project was actually a lot of fun, but I will not do it with BORG pine mystery-wood again, that was a mistake.

With the exception of the Dutch Tool Chest and  bookshelves in upcoming posts, that wraps up woodworking in 2013.

Tuesday, January 14, 2014

Projects from 2013

Lots of people make resolutions around the first of the year.  I don't really like the whole resolution thing, as it never seems to stick.  One thing I do think about is all the projects I want to build, or complete since there are still a few lingering at various stages.  Soon enough the list of projects I want to build reaches some unobtainable number in 10 years let alone 1 year.  To make myself feel better I then have to make a list of all the projects I've completed, its not as long, but still impressive enough that the to-do list is less intimidating.  All this rambling is leading towards something....the list of project I completed in 2013:

By the end of 2012 I had finished my workbench and reorganized the shop.  To help accommodate the new layout I needed a new lathe stand:
Then started to make everything round:
Tap handle, chisel handle, and peppermill

Bottle bottle opener

Started to play with the mahogany again:
Spice Rack

Roorkhee Chair progress


Then decided to practice my dovetails:
Pine; ready to go

The beginning of 142 dovetails

Quick graduation gift (with a new toy....love the LA Jack)

Finally completed the Roorkhee chairs and bookcase in May
Christy, dutifully trying out the new chairs


Starting to load the bookcase
And then broke into the special walnut I brought down from Boise

Bookmatched crotch walnut for the top
Top Shaped and finished
Completed table
After that work got crazy, we started training for the marathon, oh and the ceiling fell down...and the floor got ripped up....


Just a minor leak causes a big hole

Why not just replace the carpet while we're at it?
So the project I had been avoiding, a hand tool only chimney cupboard, was pushed back a little further

Thicknessing the back panel


Kiska does not seem concerned about the delay
Whew....that's probably enough for one post.  I will post the remaining 2013 projects in a few days.  I guess I did quite a few projects in 2013.  Hopefully 2014 is at least as productive