Showing posts with label table. Show all posts

Thursday, March 17, 2016

Nakashima Inspired Table (pt. 3)

Its been a while.  I've been pretty busy with work, but I have finally finished the table.  After cleaning up the epoxy from the miter joint it looked pretty good.  Leaving the second new thing in this project; butterfly keys.  These were surprisingly easy.  The hardest part was cutting a shape I liked.  After that its just tracing and chiseling.
Dry fit of the butterflies on the underside.
Then I got distracted and started a sharpening station...
It has since switched side with the tool chest, but remains unfinished.
Back to the table.  I didn't take many pictures because it was just a lot of planing and sanding to get the top to its finished state.  The only thing that remained was the other leg.  My initial plan was to cut angled bridle joints.  I cut them on the top of the frame, but they weren't quite as perfect as I would like, so I switched to mortise and tenons on the bottom.  Because (at least in woodworking) I'm a belt and suspenders guy I drawbored the joints, which I think looks nice, and made the shoulders really tight.

The extra length is trimmed after glue up
The finish was a coat of boiled linseed oil, then a few coats of satin Arm-R-Seal.
After the oil

Waterfall leg (harder to photograph than I thought)
End view
Top view
Overall I am pretty happy with the way it turned out.  I wish I could have figured out a way to attach the other leg without screws, but given the width, I couldn't think of another way to allow for some movement.

Once that was done, I made a kitchen helper for Ian....who was a bit impatient.
Didn't even need to wait for the platform.
The kitchen helper was directly from the WoodWhisperer plans, though I decided not to use break-down hardware, and instead glued all the joints.  It was a fun little project.  Now it's back to finishing the sharpening station while Ian lays out the kitchen buffet thing.
Measure twice.
Okay...he wasn't really doing the layout, but after he saw me doing the layout, he climbed on my sawbench and did a near perfect imitation.

Tuesday, December 8, 2015

Nakashima Inspired Table (pt. 1)


With Ian running around our glass top coffee table was destined for a short life.  In September we took a drive out to Dunlap Woodcrafts.  This is not your typical lumber store.  You will not find piles of 4/4 FAS boards.  What they do have is thousands of bdft of flitches burls, and big unique lumber.  While Ian played with the proprietors I was looking for the right slab to take home.  We found one, and it spent a couple months leaning on a wall in our living room.  For those of you following along, I have been busy building other things most recently the Woodworkers Fighting Cancer table and chair set, and a growth chart.  More information on WFC can be found here.
While he didn't know what to think at first now he loves his chairs.
I carved then painted the numbers.  Used a plane after to remove the sloppy paint.  Pine with a coat of shellac.
Part of the delay was necessity and part(most) was not knowing what I was going to do with the legs.  Last weekend I decided to grab some 2x and mock up some ideas:

Classic Nakashima style with slanted leg.
More modern, waterfall leg, and open trapezoid for the other leg
Once we set up the slab and looked, the waterfall/trapezoid won.  Those legs made the slab look lighter and seemed to flow with the room.  The waterfall leg will be a challenge.  After going back and forth I think the best way to reinforce the miter is to make "Full-Blind Multiple Splines".  This provides the most face/edge grain glue surface.
From "Tage Frid Teaches Woodworking: Joinery"
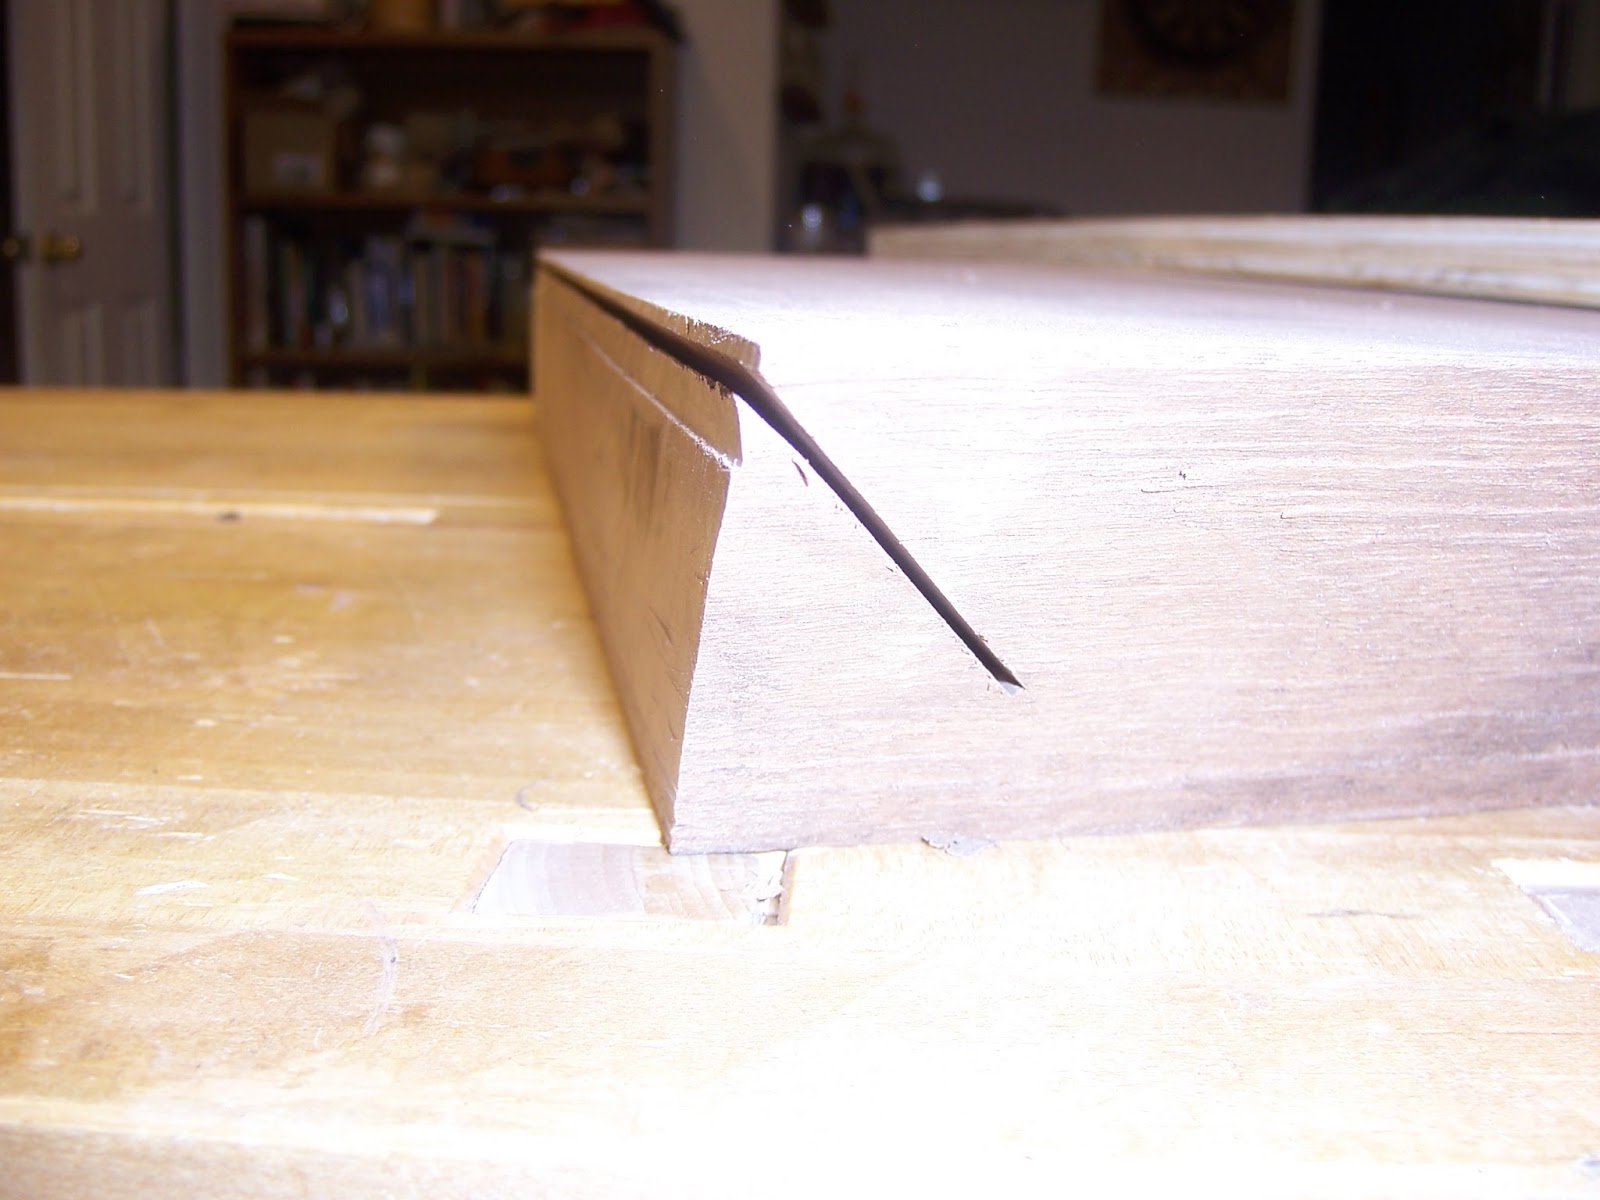
The miter requires that the piece be jointed and thicknessed prior to layout.  Even if I had a jointer, it wouldn't help me on this one.  So time to get out the jack plane and go to town.  Using my bench as a reference surface it had maybe a 1/8" of twist.  A few hours later it was trued up,

Start by marking the high spots.  
Almost there...
After I got the the board planed it was time to commit and make some cuts.  These were done with a circular saw out in the garage.  First I made 90* cuts to separate the top from the leg, then cut the 45* angle.  With the blade tilted it didn't cut all the way through, so I finished them off with a hand saw.

Double check everything.
No going back now
I finished this with a handsaw
This is the way it sat for a few weeks while I made my 45* table saw sled, (tested it on some picture frames) and a reference jig for truing the miter. 

Saturday, March 8, 2014

Busy Month


Its been over a month since I last posted, and I got out in the shop some.  I made a table for my friend's new house.  After building my hall table a few years ago I realized that (rectangular) tables are pretty simple structures.  A top, an apron, and legs, 8 mortise and tenon joints, and a way to attach the top, typically using screws to allow for some movement.  To make this table a little more interesting I decided to splay the legs at 5 degrees.  While this isn't a lot, it does change the some construction details, and was a good exercise in thinking outside of square.  Since this was built using reclaimed wood, I also decided to start with rough concept in my head, but let the wood dictate the design and dimensions as it is built.  This build went pretty fast so I once again didn't take many pictures.
Dry fit with some scraps for the top and shelf.
The table was requested to be a medium brown, and glossy, so I used the same finish I used on the bookshelves, WB dye, shellac, a glaze, then topcoats of shellac, and a coat of wax. 
After the dye and stain, ready for shellac.
Finished and ready for delivery

Quartersawn top

Overall this build when smoothly, and it was fun to design it as I built it.  I also broke into some of pear I acquired when my friend took down a tree.  I used some of the thinner pieces to make an 11-grooved box a la Roy Underhill.  This is a fun little box that is primarily made with a plow plane, in my case a rebranded Stanley 45.  it went surprisingly smooth although it is very easy to blowout when cutting the grooves for the splines, so I will probably use a backing board in the future.  The pear has some really nice figure, which was a good trial of my high angle blades for my low angle jack.  I was really pleased with the results until I put a coat of shellac on, and then the "end grain" really stands out as it disrupts the reflection.  I guess I'll have to sand next time.
11 Groove box out of Pear
The next projects will be a bit of a departure.  One is a still a Stickley piece, #800 Sideboard however it will have drawers and will be out of cherry.  The other two are a Shaker rocking chair and foot rest (cherry or maple), and a crib/bed (cherry).  The rocking chair requires me to make a bed extension and steady rest for my lathe, and also some steam bending.  The crib involves lots of slats, and some nice curves on the top rails, as well as some hopefully inventive, strong, and knockdown hardware solutions.  Hopefully I can get them done in 7 months, and remember to take some pictures.

Sunday, February 2, 2014

3 Bookshelves Completed

I gave both sets of parents a tilt top table this year.  One as parts  for my Dad's birthday.  The other (completed) as a Christmas gift to the in-laws (a 2013 project I forgot last post).  Since we were going to Salt Lake City for Thanksgiving I decided to save on shipping, and pack the table in my luggage.  Luckily all the parts are small, and only the three legs need to be glued, and not necessarily clamped since they are sliding dovetails.  So I packed the parts, some glue, and a screwdriver.  20 minutes of work, and a couple hours to dry, and the table was complete.
Cherry Tilt-Top at the in-laws

The bookshelves for my sisters while portable, would not fit in luggage, and since each set( 2 uprights, 4 shelves, 8 pegs) weighs about 35 lbs, that doesn't leave much room for protection from baggage handlers or clothes.  On top of that they weren't finished when my family had to leave.    They each got a slightly modified version of my A&C finish that I used on our dining table.  Preraise the grain then sand with 220.  Apply a waterbased dye, then a seal coat of Seal-a-cell or shellac.  On top of the seal coat is an oil stain, I prefer using a gel stain, but the liquid stain works well too.  Here is where I switched it up a bit, in the past I have used Arm-R-Seal with great success, but with so many surfaces, and now that I own a compressor I wanted to try spraying.  These shelves got 3 coats of Zinnser Sealcoat.  Once cured for a couple days I applied a furniture wax with synthetic steel wool.
Spraying Carly's shelves
Completed Shelves
To ship them I used some 2-ply corrugated cardboard I saved from replacing the fridge, and some 1/2" insulating foam and constructed a fairly rigid box that didn't allow the shelves to move at all.  They seemed to make it just fine, and Carly already has hers setup.

With the girls bookshelves finished and out of the shop it was time to get back to my bookshelf.  After finessing the joinery it was time to fit the wedges and then chamfer all the edges
Ready for sanding, finish, and cookbooks
After that its on to sanding, and finishing.  I am using the finishing schedule as above.

After the first coat of dye

Completed bookshelf
Already full of cookbooks


Tuesday, January 14, 2014

Projects from 2013

Lots of people make resolutions around the first of the year.  I don't really like the whole resolution thing, as it never seems to stick.  One thing I do think about is all the projects I want to build, or complete since there are still a few lingering at various stages.  Soon enough the list of projects I want to build reaches some unobtainable number in 10 years let alone 1 year.  To make myself feel better I then have to make a list of all the projects I've completed, its not as long, but still impressive enough that the to-do list is less intimidating.  All this rambling is leading towards something....the list of project I completed in 2013:

By the end of 2012 I had finished my workbench and reorganized the shop.  To help accommodate the new layout I needed a new lathe stand:
Then started to make everything round:
Tap handle, chisel handle, and peppermill

Bottle bottle opener

Started to play with the mahogany again:
Spice Rack

Roorkhee Chair progress


Then decided to practice my dovetails:
Pine; ready to go

The beginning of 142 dovetails

Quick graduation gift (with a new toy....love the LA Jack)

Finally completed the Roorkhee chairs and bookcase in May
Christy, dutifully trying out the new chairs


Starting to load the bookcase
And then broke into the special walnut I brought down from Boise

Bookmatched crotch walnut for the top
Top Shaped and finished
Completed table
After that work got crazy, we started training for the marathon, oh and the ceiling fell down...and the floor got ripped up....


Just a minor leak causes a big hole

Why not just replace the carpet while we're at it?
So the project I had been avoiding, a hand tool only chimney cupboard, was pushed back a little further

Thicknessing the back panel


Kiska does not seem concerned about the delay
Whew....that's probably enough for one post.  I will post the remaining 2013 projects in a few days.  I guess I did quite a few projects in 2013.  Hopefully 2014 is at least as productive