Showing posts with label walnut. Show all posts

Thursday, March 17, 2016

Nakashima Inspired Table (pt. 3)

Its been a while.  I've been pretty busy with work, but I have finally finished the table.  After cleaning up the epoxy from the miter joint it looked pretty good.  Leaving the second new thing in this project; butterfly keys.  These were surprisingly easy.  The hardest part was cutting a shape I liked.  After that its just tracing and chiseling.
Dry fit of the butterflies on the underside.
Then I got distracted and started a sharpening station...
It has since switched side with the tool chest, but remains unfinished.
Back to the table.  I didn't take many pictures because it was just a lot of planing and sanding to get the top to its finished state.  The only thing that remained was the other leg.  My initial plan was to cut angled bridle joints.  I cut them on the top of the frame, but they weren't quite as perfect as I would like, so I switched to mortise and tenons on the bottom.  Because (at least in woodworking) I'm a belt and suspenders guy I drawbored the joints, which I think looks nice, and made the shoulders really tight.

The extra length is trimmed after glue up
The finish was a coat of boiled linseed oil, then a few coats of satin Arm-R-Seal.
After the oil

Waterfall leg (harder to photograph than I thought)
End view
Top view
Overall I am pretty happy with the way it turned out.  I wish I could have figured out a way to attach the other leg without screws, but given the width, I couldn't think of another way to allow for some movement.

Once that was done, I made a kitchen helper for Ian....who was a bit impatient.
Didn't even need to wait for the platform.
The kitchen helper was directly from the WoodWhisperer plans, though I decided not to use break-down hardware, and instead glued all the joints.  It was a fun little project.  Now it's back to finishing the sharpening station while Ian lays out the kitchen buffet thing.
Measure twice.
Okay...he wasn't really doing the layout, but after he saw me doing the layout, he climbed on my sawbench and did a near perfect imitation.

Monday, December 21, 2015

Nakashima Inspired Table (pt. 2)


 The only way I could think to do the miter was to get it close, then finesse it to perfect using a hand plane (Low Angle Jack being the weapon of choice).  To make it easier on myself I decided to make a single purpose Donkey's Ear type planing jig.  I thought about making a generic one, but I don't see needing one 18" long and 2.5" thick in the future.  Of course first I needed to cut some miters.  For the top and bottom pieces (45* on the long edge) I used cutoffs from my french cleats which I triple checked for 45.  For the end pieces I thought about just setting my miter gauge, but 45s are something I could see doing more of so I decided to make a dedicated sled.  I liked the picture frame sled from FWW a few years ago, and its use isn't limited solely to picture frames, so I made one of those:
I put this off for far too long
And since I had some walls that needed posters, and posters that needed frames, I tested the sled a few times.  Which required a spline jig.
Nothing fancy but it works well.
The posters definitely improved the feel of the shop.

Not in love with this wall, but the posters help.
I still have 2 more posters, and wall space for more french cleats, if I can figure out what I want to put on them.  While I was distracted I figured I might as well finish that Longworth chuck I started a few months ago.
Not the prettiest but it will work.
And finally I got back to the coffee table.  I cut the 2x4 to thickness and screwed together my planing jig.
Time to make some shavings.
After getting close it was clear that hte jig was bowing a bit due to the clamps being located at the very edges.  I added a little pressure to the middle and cleaned it up.
Almost there.
As I was finishing up the first side I realized that I needed a way to reference the jig if I needed to trim it up again.  I started by just drawing a line, but even that didn't really sit well with me.  I ended up ripping some thin strips and using 2-sided tape to create a solid reference surface for the back of my jig.  Then I did the other side, and tested the fit.  At first I made used plywood to make an "inside corner" that sat on the outside of the joint, and it was easy to see how far out of 90* it was.  It wasn't.  However it prevented me from seeing how the edges met.  After some thinking and very careful maneuvering I was able to look at the outside of the joint.
Testing the fit
Pretty good
Overall the joint was pretty tight.  But after a bit more fussing I realized that the wood had cupped every so slightly.  Over 18" (then double since both the top and the leg cupped) ever so slightly isnt good enough.  Luckily I left the reference boards in place and was able to take the cup out where the jig attached.  It was probably no more than 4 passes with the plane and the joint closed up along its length.  To mortise for the tenons I need to create sort of a box joint jig.  Luckily I can use my reference strips to align the box joint jig.
Nothing fancy but it worked well.
 This was one of the few operations for which my shop struggled.  I have all the tools, and skills, the problem is the bench is in the wrong room.  I tried clamping the table to my other workbench  and hit a wall.  I tried to attach it to my table saw, but the clamps didn't feel as solid.  In the future I will look for ways to add some clamping surfaces in the machine room (though this is a fairly unique project). The only trick is making sure you flip the pattern over when routing the other side.
Alignment looks good.
 Then I just cleaned up the edges with a chisel.  Since my mortises weren't all exactly 1/2" wide, and also probably varied in length just a little I cut the tenons a little over sized ~1/32".
Ready for fitting.
 First I planed them to thickness (starting with the widest going down from there).  Then the mortises and tenons were all labeled.  I decided to alternate grain direction, though I can't image it makes any difference.  I trimmed them at the shooting board.
The first five have been fitted
The first test fit went pretty well.  Nothing bound, , but one corner didn't close.  Since I knew it fit before the tenons, it was a quick diagnosis (a few tenons were just a little oversized).  After trimming them at the shooting board all was well.

That was the first of many test fits.  Eventually I came up with a system that was fast and safe enough to actually add glue.  Then I took a breath and slowed down.  I organized my clamps, swept the floor, gathered some scraps and cauls, got out the gloves, pre-ripped some paper towels and covered my bench with wax paper.  I consciously spent time prepping for the glue up.  I recently started doing this when faced with something stressful/irreversible, and I find it helps me relax and makes the process much smoother.  Finally I stopped putting it off, and did the glue up. 

Overall it went well.  It could have been a bit smoother, but the miter looks pretty tight, and its square.  In a day or so I'll take off the clamps, and hopefully no surprises.

Tuesday, December 8, 2015

Nakashima Inspired Table (pt. 1)


With Ian running around our glass top coffee table was destined for a short life.  In September we took a drive out to Dunlap Woodcrafts.  This is not your typical lumber store.  You will not find piles of 4/4 FAS boards.  What they do have is thousands of bdft of flitches burls, and big unique lumber.  While Ian played with the proprietors I was looking for the right slab to take home.  We found one, and it spent a couple months leaning on a wall in our living room.  For those of you following along, I have been busy building other things most recently the Woodworkers Fighting Cancer table and chair set, and a growth chart.  More information on WFC can be found here.
While he didn't know what to think at first now he loves his chairs.
I carved then painted the numbers.  Used a plane after to remove the sloppy paint.  Pine with a coat of shellac.
Part of the delay was necessity and part(most) was not knowing what I was going to do with the legs.  Last weekend I decided to grab some 2x and mock up some ideas:

Classic Nakashima style with slanted leg.
More modern, waterfall leg, and open trapezoid for the other leg
Once we set up the slab and looked, the waterfall/trapezoid won.  Those legs made the slab look lighter and seemed to flow with the room.  The waterfall leg will be a challenge.  After going back and forth I think the best way to reinforce the miter is to make "Full-Blind Multiple Splines".  This provides the most face/edge grain glue surface.
From "Tage Frid Teaches Woodworking: Joinery"
The miter requires that the piece be jointed and thicknessed prior to layout.  Even if I had a jointer, it wouldn't help me on this one.  So time to get out the jack plane and go to town.  Using my bench as a reference surface it had maybe a 1/8" of twist.  A few hours later it was trued up,

Start by marking the high spots.  
Almost there...
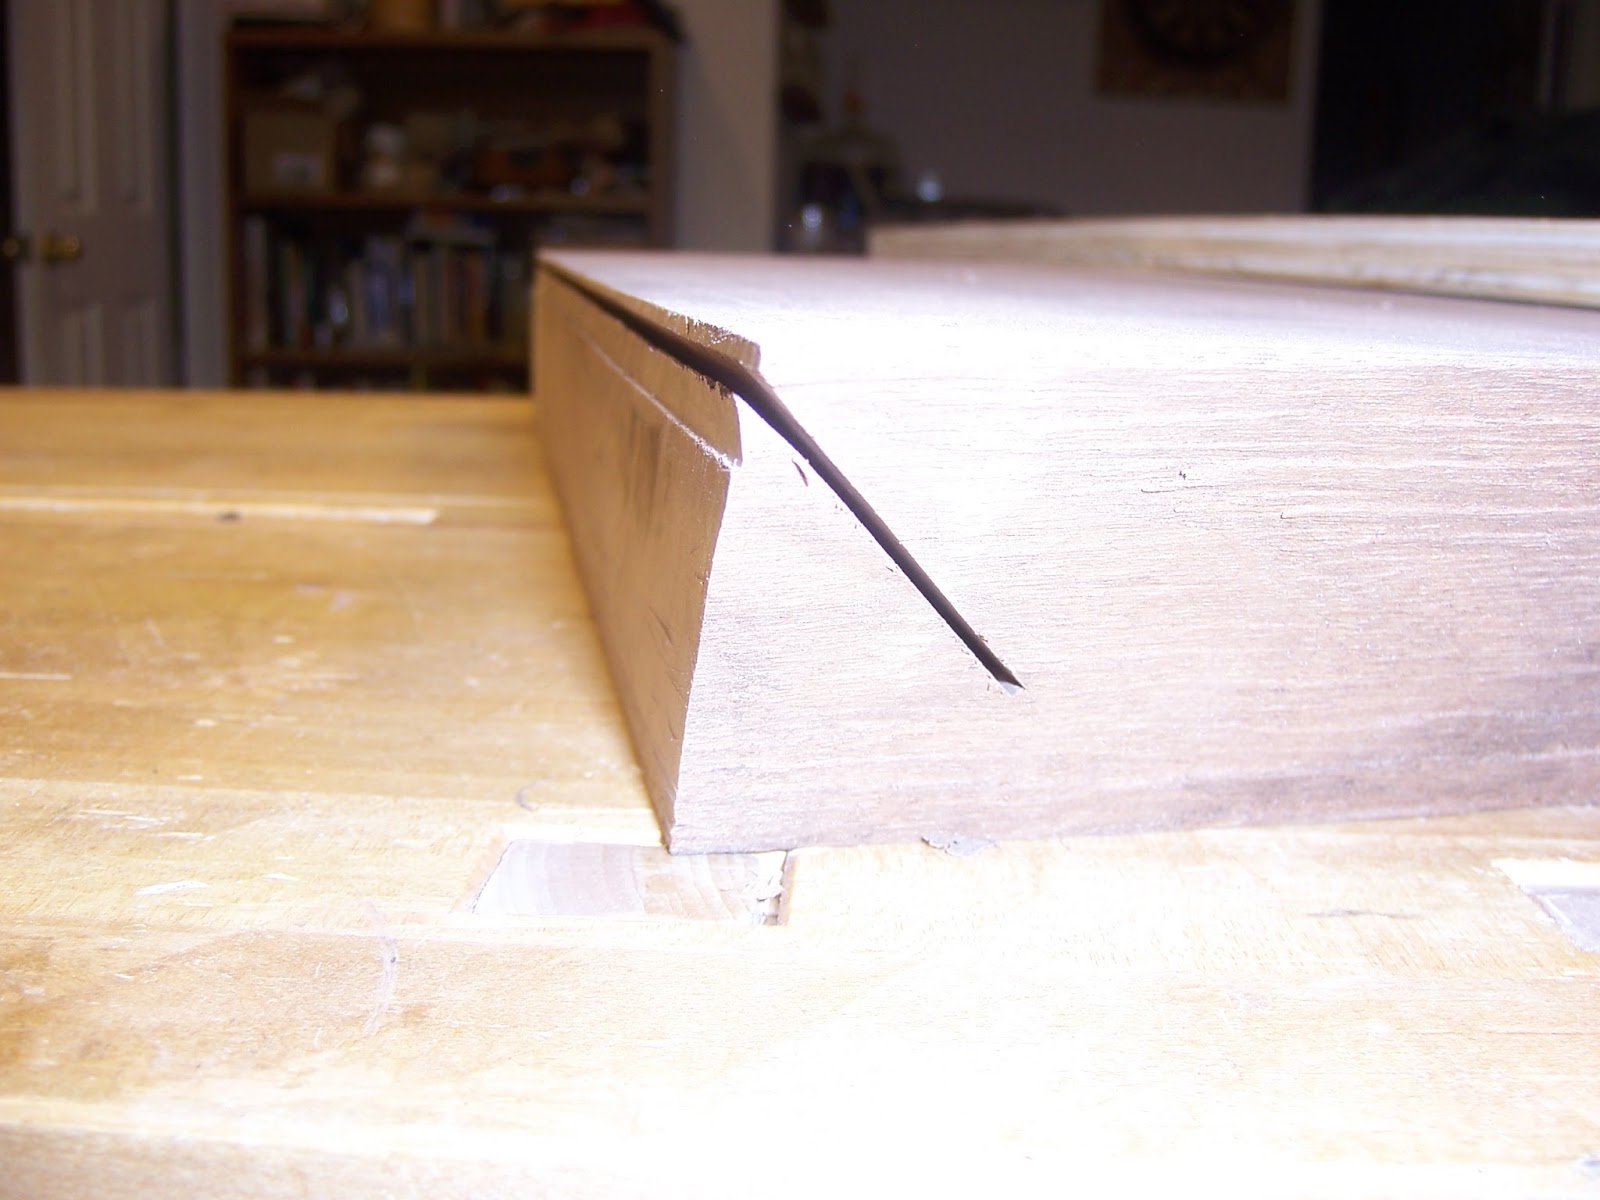
After I got the the board planed it was time to commit and make some cuts.  These were done with a circular saw out in the garage.  First I made 90* cuts to separate the top from the leg, then cut the 45* angle.  With the blade tilted it didn't cut all the way through, so I finished them off with a hand saw.

Double check everything.
No going back now
I finished this with a handsaw
This is the way it sat for a few weeks while I made my 45* table saw sled, (tested it on some picture frames) and a reference jig for truing the miter. 

Thursday, January 29, 2015

Krenov Inspired Table

The canoe rack went pretty smoothly, and I basically forgot to take pictures till the end.  The rails are half-lap dovetails, and the vertical pieces have giant tenons into the feet.  Each joint is reinforced with a lag screw.  I took an old plastic cutting board and made some feet to keep the wood off the ground.  I think it cleaned up the boats quite nicely.

Canoe Rack
Getting rid of the wire rack improved the living room.  However now the computer monitor sat on top of the tower, on the floor.   I thought about making a quick shaker style end table, or something quick. Then I saw the base of one of Krenov's standing cabinets, and thought that would look good as a small table.  The joinery is pretty simple if you do it while all the pieces are square.
Dry fit of the leg and "apron" joints.
 Around this point I decided to add a drawer.  Since  the "apron" isn't symmetric, and is pretty low on the sides I added something of a web frame to support the drawer and give the legs some rigidity.
Drawer support
Next up is shaping the curves.  This was something I hadn't done before, but really wasn't that hard.  I cut out the curve i liked on one leg, then used that as a pattern for the rest.
Copying the curves
Once the lines are traced, I cut the legs on the band saw.  The legs are curved in both directions, so to make the second set of cuts I taped the cutoffs back on to keep the leg square on the saw
Taping the cut offs back on.
I then smoothed and finessed the curves with spokeshaves. Once they were all similar I rounded over the edges.
All the curves cut, just roundovers and sanding.
The drawer opens to the sides instead of the front.  I also made the drawer sides walnut, to keep the front looking "open".  The drawer fronts are maple, and will hopefully look like part of the apron (except for the pull).  The drawer joinery is halfblind dovetails.


I decided to try my hand at very simple carving for the pulls.  I decided to leave the tool marks to give it some character.  Now in poor lighting the completed table.  All that's left is to apply the finish.
Completed table.  When closed the drawer is inset from the legs a little bit. 
"London pattern" half-blind dovetails.
Bookmatched Top
Carved pulls.
Once the finish is applied I will get some pictures in better lighting.  Just as I was about to apply the finish someone took down a tree, and I got distracted making bowl blanks:
Fresh cut wood.
Cutting to manageable size
No idea what kind of wood this is...any ideas?
1 bowl blank completed for drying.
Rounding the blanks on the bandsaw.
The wood is pretty heavy, even for green wood.  Looks to be ring porous, and the red heartwood is fading to more closely match the sapwood.  Anyone recognize the wood?